ListView is an another UI control of Android. ListView is a group of views which display a list of scrollable items. To populate the list item Adapter is used which pulls data from Data Structures like Array, ArrayList etc. or from Database query.
ListView is simple view control.We will see three different example for ListView.
First by extending the ListActivity to display simple ListView.
Second by implementing the ListView in an Activity .
Third by using Custom Adapter to customize the listView.
1. By Extending ListActivity:
Create a new android project in eclipse. For our project we will use project name as “ListViewDemoOne” and the package name as “com.greenman_journey.listviewdemoone”.
Click next ,leave the default selections and click Next. Leave all the details in default state and click Finish.
The newly created project will contain MainActivity.java and activity_main.xml files, which are sufficient to demonstrate ListView. We need to change following code ,
public class MainActivity extends Activity {
to
public class MainActivity extends ListActivity{
and add the following line in imports to import ListActivity or use shortcut as control+o
import android.app.ListActivity;
In xml file we need to add the ListView control. When we are using a ListActivity we need to provide an ID in "@android:id/list" manner. Write the following code snippet in activity_main.xml
<ListView
android:id="@id/android:list"
android:layout_width="fill_parent"
android:layout_height="fill_parent"
android:background="#80397b" >
</ListView>
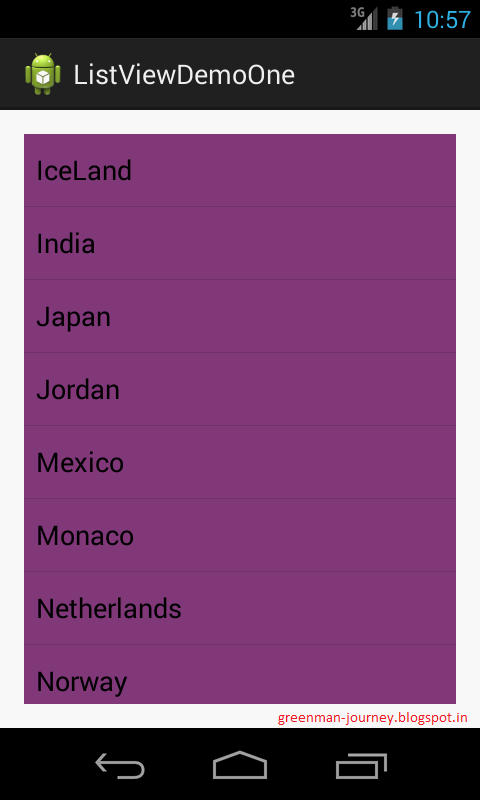
If we do not declare ListView in xml file ListActivity pick the default ListView declared in android package.Now we will provide a data source to display on List. We will use an ArrayList to provide data. I have taken countries name for an example as
ArrayList<String>arrayListToDisplay = new ArrayList<String>();
arrayListToDisplay.add("IceLand");
arrayListToDisplay.add("India");
arrayListToDisplay.add("Japan");
arrayListToDisplay.add("Jordan");
arrayListToDisplay.add("Mexico");
arrayListToDisplay.add("Monaco");
arrayListToDisplay.add("Netherlands");
arrayListToDisplay.add("Norway");
arrayListToDisplay.add("Oman");
arrayListToDisplay.add("Peru");
To bind the listview with the data source we need an Adapter. We will be using setListAdapter(adapter) method of ListActivity to display items in ListView. Android SDK provides many implementations of the ListAdapter. Here we will be using the simple ArrayAdapter.To intialize the arrayadapter we need a Context of the class/Application, a layout file android sdk provide some default layout for listview which have names such as simple_list_item_1, simple_list_item_2, and two_line_list_item, we will be using simple_list_item_1 and a data source. So we will initialize adapter as
ArrayAdapter<String> adapter = new ArrayAdapter<String>(MainActivity.this, android.R.layout.simple_list_item_1, arrayListToDisplay);
now set this adapter object to list as.
setListAdapter(adapter);
Now we will run the application and will get out similar like
We will implement a click listener on ListView. We will override the onListItemClick() method of ListActivity. It will help us to identify which item is clicked. Write the following code :
@Override
protected void onListItemClick(ListView listView, View view, int position, long id) {
super.onListItemClick(listView, view, position, id);
String selectedCountryString = (String) listView.getAdapter().getItem(position);
Toast.makeText(MainActivity.this, "Selected Country is "+selectedCountryString, Toast.LENGTH_LONG).show();
}
That all!! The Source Code for above article is available at GitHub.
2. By implementing the ListView in an Activity:
Create a new android project in eclipse. For our project we will use project name as “ListViewDemoTwo” and the package name as “com.greenman_journey.listviewdemotwo”.
<ListView
android:id="@+id/listView"
android:layout_width="fill_parent"
android:layout_height="fill_parent"
android:background="@color/white" >
</ListView>
Here we provide id "@+id/listView" manner . It means we are not using SDK default control.
In MainActivity.java file we will initialize a ListView Object as
private ListView listView = null;
listView.setAdapter(adapter);
We will implement a click listener on ListView. We will set a itemClickListner to detect the click on listView as follows
listView.setOnItemClickListener(new OnItemClickListener() {
@Override
public void onItemClick(AdapterView<?> view, View arg1, int position,
long arg3) {
String selectedCountryString = (String) listView.getAdapter().getItem(position);
Toast.makeText(MainActivity.this, "Selected Country is "+selectedCountryString, Toast.LENGTH_LONG).show();
}
});
![]()
 That all!! The Source Code for ListView in an Activity article is available at GitHub.
3. By using Custom Adapter to customize the listView:
We can customize the list view as we desired . ArrayAdapter has limitation for customization. To support customization we can use Custom Adapter. To create a custom adapter we need to sub class the BaseAdapter class or need to extend adapter implementation.To prepare a Custom Adapter we need a layout file which will be display on each item in list view.So we will take our step by creating a new Android Application Project. We will be showing Scientist Name ,his award and the year to customize the ListView.
Create a new android project in eclipse. For our project we will use project name as “ListViewDemoThree” and the package name as “com.greenman_journey.listviewdemothree”.
Now create a custom layout for child of listView. For displaying the Scientist Name, Award and year we will be needing a layout file with three text views with name child_custom_view.xml as
<?xml version="1.0" encoding="utf-8"?>
<LinearLayout xmlns:android="http://schemas.android.com/apk/res/android"
android:layout_width="match_parent"
android:layout_height="match_parent"
android:orientation="vertical"
android:padding="5dp" >
<TextView
android:id="@+id/textView_ScientistName"
android:layout_width="fill_parent"
android:layout_height="wrap_content"
android:textColor="@android:color/black"
android:textSize="22sp" />
<TextView
android:id="@+id/textView_Award"
android:layout_width="fill_parent"
android:layout_height="wrap_content"
android:textColor="@android:color/darker_gray"
android:textSize="18sp" />
<TextView
android:id="@+id/textView_Year"
android:layout_width="fill_parent"
android:layout_height="wrap_content"
android:textColor="@android:color/darker_gray"
android:textSize="18sp" />
</LinearLayout>
We have added three textViews with different ids and there text color and text size. The android best practice is we should use "sp" instead of "dp" for text size.
Now we will follow some oops concepts. We will make a class to holds the data from each cell of list view. Create a new class with name ScientistRecord and will be having there local params as scientistName, awardName and yearOfAward. Make getter and setter for all the three params. Eclipse provide a control for making getter setter as select the three params then click Source in tool bar then click Generate Getters and Setters. A pop up will appear click SelectAll and finish.
the class will look like
public class ScientistRecord {
private String scientistName;
private String awardName;
private String yearOfAward;
public String getScientistName() {
return scientistName;
}
public void setScientistName(String scientistName) {
this.scientistName = scientistName;
}
public String getAwardName() {
return awardName;
}
public void setAwardName(String awardName) {
this.awardName = awardName;
}
public String getYearOfAward() {
return yearOfAward;
}
public void setYearOfAward(String yearOfAward) {
this.yearOfAward = yearOfAward;
}
}
Now prepare data to display the on list in MainActivity.java. We will create a method which will return a ArrayList of ScientistRecord Data as follows
private ArrayList<ScientistRecord> prepareDataForListView() {
ArrayList<ScientistRecord> dataRecordList = new ArrayList<ScientistRecord>();
ScientistRecord record = new ScientistRecord();
record.setScientistName("John Howard Northrop");
record.setAwardName("Nobel Prize");
record.setYearOfAward("1946");
dataRecordList.add(record);
record = new ScientistRecord();
record.setScientistName("William Giauque");
record.setAwardName("Nobel Prize");
record.setYearOfAward("1949");
dataRecordList.add(record);
record = new ScientistRecord();
record.setScientistName("Paul Sabatier");
record.setAwardName("Noble Laureates");
record.setYearOfAward("1912");
dataRecordList.add(record);
record = new ScientistRecord();
record.setScientistName("George Andrew Olah's");
record.setAwardName("Priestley Medal");
record.setYearOfAward("2005");
dataRecordList.add(record);
record = new ScientistRecord();
record.setScientistName("Sir William Ramsay");
record.setAwardName("Noble Prize");
record.setYearOfAward("1904");
dataRecordList.add(record);
record = new ScientistRecord();
record.setScientistName("V. Ramakrishnan");
record.setAwardName("Nobel Prize");
record.setYearOfAward("2009");
dataRecordList.add(record);
return dataRecordList;
}
the getItemId() method is used to tell the adapter the id of element at particular instance.We will define it as:
public long getItemId(int position) {
return position;
}
the getItem() method is used to tell the adapter of item at particular instance.We will define it as:
public Object getItem(int position) {
return list.get(position);
}
The last method getView is used to define the layout for cell of list view. We will also create a inner class for recycling the cells as:
class PlaceHolder {
TextView scientistNameTextView ;
TextView awardNameTextView ;
TextView yearOfAwardTextView ;
}
and will write code for getView methods as:
public View getView(int position, View convertView, ViewGroup parent) {
PlaceHolder placeHolder ;
if (convertView == null) {
placeHolder = new PlaceHolder();
LayoutInflater inflater = (LayoutInflater) context.getSystemService(Context.LAYOUT_INFLATER_SERVICE);
convertView = inflater.inflate(R.layout.child_custom_view, parent,false);
placeHolder.scientistNameTextView = (TextView)convertView.findViewById(R.id.textView_ScientistName);
placeHolder.awardNameTextView = (TextView) convertView.findViewById(R.id.textView_Award);
placeHolder.yearOfAwardTextView = (TextView)convertView.findViewById(R.id.textView_Year);
convertView.setTag(placeHolder);
}else{
placeHolder = (PlaceHolder) convertView.getTag();
}
ScientistRecord record = list.get(position);
placeHolder.scientistNameTextView.setText(record.getScientistName());
placeHolder.awardNameTextView.setText(record.getAwardName());
placeHolder.yearOfAwardTextView.setText(record.getYearOfAward());
return convertView;
}
Now in our MainActivity.java we will initialize the list view object and make an object of CustomAdapter as
CustomAdapter adapter = new CustomAdapter(MainActivity.this, prepareDataForListView());
Set this adapter to listView as
listView.setAdapter(adapter);
Give this application a Run. It will look Like
 The source code for Custom Adapter is available at GitHub.
2. By implementing the ListView in an Activity:
Create a new android project in eclipse. For our project we will use project name as “ListViewDemoTwo” and the package name as “com.greenman_journey.listviewdemotwo”.
Click next ,leave the default selections and click Next. Leave all the details in default state and click Finish.
The newly created project will contain MainActivity.java and activity_main.xml files, which are sufficient to demonstrate ListView. We write following code snippet in activity_main.xml file
In MainActivity.java file we will initialize a ListView Object as
private ListView listView = null;
in onCreate method we bind this listView object to the xml object with findViewById as
listView = (ListView)findViewById(R.id.listView);
Now we will provide a data source to display on List. We will use an ArrayList to provide data. I have taken countries name for an example as
ArrayList<String>arrayListToDisplay = new ArrayList<String>();
arrayListToDisplay.add("IceLand");
arrayListToDisplay.add("India");
arrayListToDisplay.add("Japan");
arrayListToDisplay.add("Jordan");
arrayListToDisplay.add("Mexico");
arrayListToDisplay.add("Monaco");
arrayListToDisplay.add("Netherlands");
arrayListToDisplay.add("Norway");
arrayListToDisplay.add("Oman");
arrayListToDisplay.add("Peru");
To bind the listview with the data source we need an Adapter. We will be using setListAdapter(adapter) method of ListActivity to display items in ListView. Android SDK provides many implementations of the ListAdapter. Here we will be using the simple ArrayAdapter.To intialize the arrayadapter we need a Context of the class/Application, a layout file ,we will be using simple_list_item_1 and a data source. So we will initialize adapter as
ArrayAdapter<String> adapter = new ArrayAdapter<String>(MainActivity.this, android.R.layout.simple_list_item_1, arrayListToDisplay);
now set this adapter object to list as.
We will implement a click listener on ListView. We will set a itemClickListner to detect the click on listView as follows
listView.setOnItemClickListener(new OnItemClickListener() {
@Override
public void onItemClick(AdapterView<?> view, View arg1, int position,
long arg3) {
String selectedCountryString = (String) listView.getAdapter().getItem(position);
Toast.makeText(MainActivity.this, "Selected Country is "+selectedCountryString, Toast.LENGTH_LONG).show();
}
});
Now we will run the application and will get out similar like:
3. By using Custom Adapter to customize the listView:
We can customize the list view as we desired . ArrayAdapter has limitation for customization. To support customization we can use Custom Adapter. To create a custom adapter we need to sub class the BaseAdapter class or need to extend adapter implementation.To prepare a Custom Adapter we need a layout file which will be display on each item in list view.So we will take our step by creating a new Android Application Project. We will be showing Scientist Name ,his award and the year to customize the ListView.
Create a new android project in eclipse. For our project we will use project name as “ListViewDemoThree” and the package name as “com.greenman_journey.listviewdemothree”.
Click next ,leave the default selections and click Next. Leave all the details in default state and click Finish.
The newly created project will contain MainActivity.java and activity_main.xml files. We write following code snippet in activity_main.xml file
<ListView android:id="@+id/listView" android:layout_width="fill_parent" android:layout_height="fill_parent" android:background="@color/white" > </ListView>
<ListView android:id="@+id/listView" android:layout_width="fill_parent" android:layout_height="fill_parent" android:background="@color/white" > </ListView>
<?xml version="1.0" encoding="utf-8"?>
<LinearLayout xmlns:android="http://schemas.android.com/apk/res/android"
android:layout_width="match_parent"
android:layout_height="match_parent"
android:orientation="vertical"
android:padding="5dp" >
<TextView
android:id="@+id/textView_ScientistName"
android:layout_width="fill_parent"
android:layout_height="wrap_content"
android:textColor="@android:color/black"
android:textSize="22sp" />
<TextView
android:id="@+id/textView_Award"
android:layout_width="fill_parent"
android:layout_height="wrap_content"
android:textColor="@android:color/darker_gray"
android:textSize="18sp" />
<TextView
android:id="@+id/textView_Year"
android:layout_width="fill_parent"
android:layout_height="wrap_content"
android:textColor="@android:color/darker_gray"
android:textSize="18sp" />
</LinearLayout>
We have added three textViews with different ids and there text color and text size. The android best practice is we should use "sp" instead of "dp" for text size.
Now we will follow some oops concepts. We will make a class to holds the data from each cell of list view. Create a new class with name ScientistRecord and will be having there local params as scientistName, awardName and yearOfAward. Make getter and setter for all the three params. Eclipse provide a control for making getter setter as select the three params then click Source in tool bar then click Generate Getters and Setters. A pop up will appear click SelectAll and finish.
the class will look like
public class ScientistRecord {
private String scientistName;
private String awardName;
private String yearOfAward;
public String getScientistName() {
return scientistName;
}
public void setScientistName(String scientistName) {
this.scientistName = scientistName;
}
public String getAwardName() {
return awardName;
}
public void setAwardName(String awardName) {
this.awardName = awardName;
}
public String getYearOfAward() {
return yearOfAward;
}
public void setYearOfAward(String yearOfAward) {
this.yearOfAward = yearOfAward;
}
}
Now prepare data to display the on list in MainActivity.java. We will create a method which will return a ArrayList of ScientistRecord Data as follows
private ArrayList<ScientistRecord> prepareDataForListView() {
ArrayList<ScientistRecord> dataRecordList = new ArrayList<ScientistRecord>();
ScientistRecord record = new ScientistRecord();
record.setScientistName("John Howard Northrop");
record.setAwardName("Nobel Prize");
record.setYearOfAward("1946");
dataRecordList.add(record);
record = new ScientistRecord();
record.setScientistName("William Giauque");
record.setAwardName("Nobel Prize");
record.setYearOfAward("1949");
dataRecordList.add(record);
record = new ScientistRecord();
record.setScientistName("Paul Sabatier");
record.setAwardName("Noble Laureates");
record.setYearOfAward("1912");
dataRecordList.add(record);
record = new ScientistRecord();
record.setScientistName("George Andrew Olah's");
record.setAwardName("Priestley Medal");
record.setYearOfAward("2005");
dataRecordList.add(record);
record = new ScientistRecord();
record.setScientistName("Sir William Ramsay");
record.setAwardName("Noble Prize");
record.setYearOfAward("1904");
dataRecordList.add(record);
record = new ScientistRecord();
record.setScientistName("V. Ramakrishnan");
record.setAwardName("Nobel Prize");
record.setYearOfAward("2009");
dataRecordList.add(record);
return dataRecordList;
}
Now we need to add a CustomAdapter class in our project.For adding we need to right click on package then new then class.A pop up will appear for naming of class we will name as CustomAdapter click finish. Extend the CustomAdapter class with BaseAdapter class as.
public class CustomAdapter extends BaseAdapter
CustomAdapter class must implement the inherited abstract methods of BaseAdapter such as getCount() , getItem(int i), getItemId(int i) and getView(). Now we step by step will give the definition to these methods and also create a constructor for CustomAdapter class which will have two params one is Context and another is the data source. We initialize local variables in constructor as
public CustomAdapter(Context context,ArrayList<ScientistRecord>list) {
super();
this.context = context;
this.list = list;
}
the getCount() method is used to tell the adapter how much cell are going to be populated. We will define it as:
public int getCount() {
return list.size();
}
public long getItemId(int position) {
return position;
}
the getItem() method is used to tell the adapter of item at particular instance.We will define it as:
public Object getItem(int position) {
return list.get(position);
}
The last method getView is used to define the layout for cell of list view. We will also create a inner class for recycling the cells as:
class PlaceHolder {
TextView scientistNameTextView ;
TextView awardNameTextView ;
TextView yearOfAwardTextView ;
}
and will write code for getView methods as:
public View getView(int position, View convertView, ViewGroup parent) {
PlaceHolder placeHolder ;
if (convertView == null) {
placeHolder = new PlaceHolder();
LayoutInflater inflater = (LayoutInflater) context.getSystemService(Context.LAYOUT_INFLATER_SERVICE);
convertView = inflater.inflate(R.layout.child_custom_view, parent,false);
placeHolder.scientistNameTextView = (TextView)convertView.findViewById(R.id.textView_ScientistName);
placeHolder.awardNameTextView = (TextView) convertView.findViewById(R.id.textView_Award);
placeHolder.yearOfAwardTextView = (TextView)convertView.findViewById(R.id.textView_Year);
convertView.setTag(placeHolder);
}else{
placeHolder = (PlaceHolder) convertView.getTag();
}
ScientistRecord record = list.get(position);
placeHolder.scientistNameTextView.setText(record.getScientistName());
placeHolder.awardNameTextView.setText(record.getAwardName());
placeHolder.yearOfAwardTextView.setText(record.getYearOfAward());
return convertView;
}
Now in our MainActivity.java we will initialize the list view object and make an object of CustomAdapter as
CustomAdapter adapter = new CustomAdapter(MainActivity.this, prepareDataForListView());
Set this adapter to listView as
listView.setAdapter(adapter);
Give this application a Run. It will look Like
Very informative blog. I was searching for something like this. your blog helped me a lot. Thank you so much for sharing. Web Design Fort Lauderdale
ReplyDelete